⚡ Quick Answer
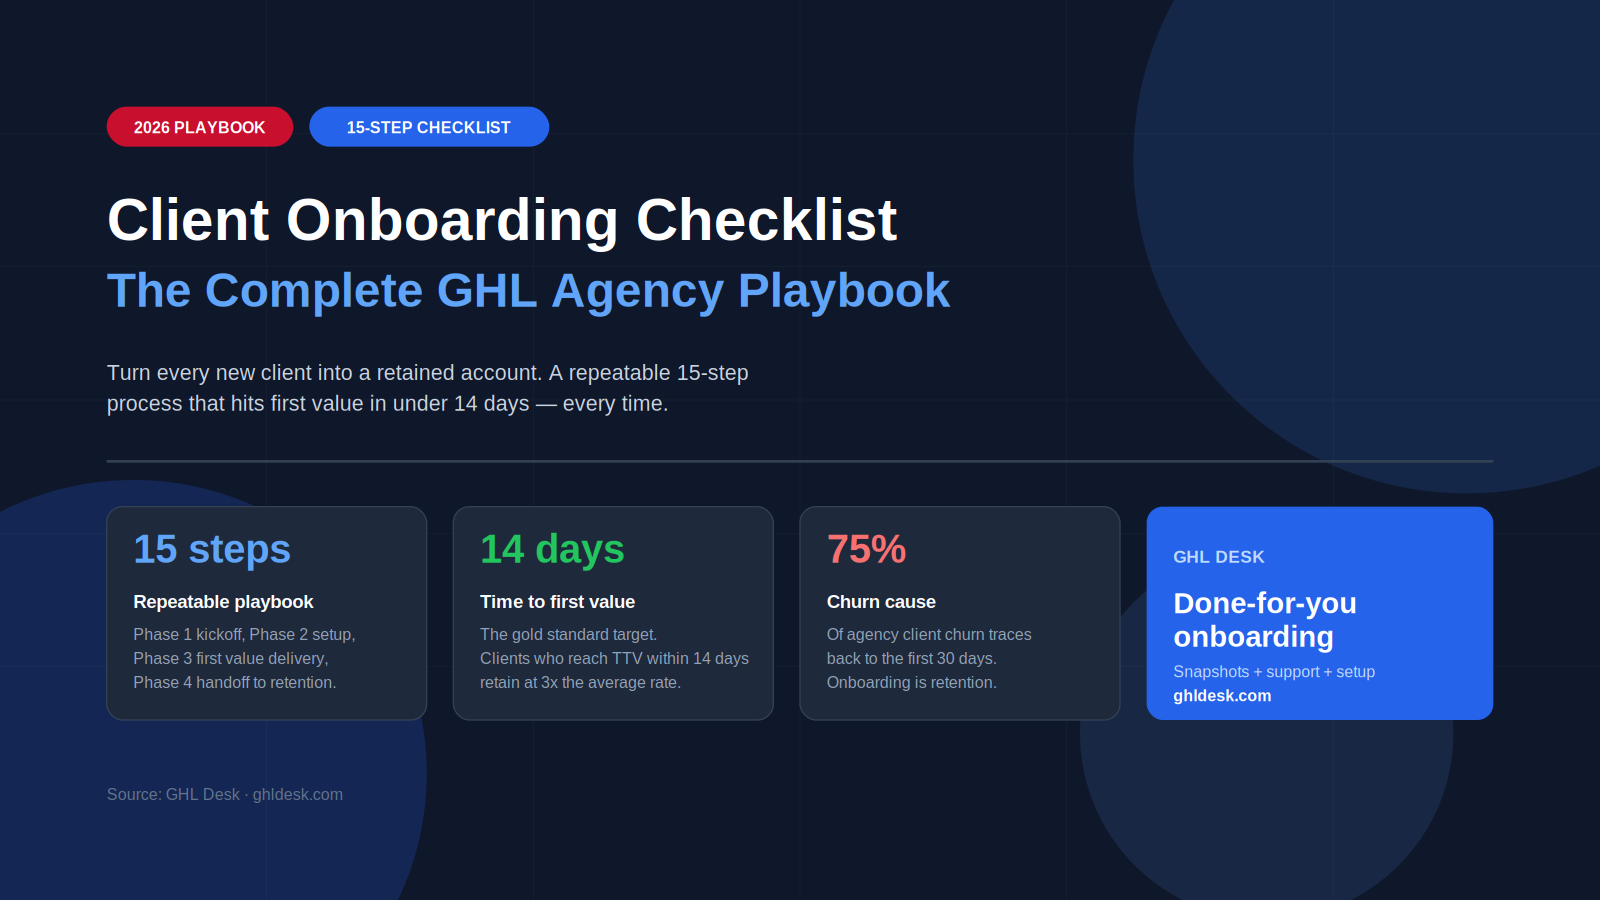
A GoHighLevel client onboarding checklist is the 15-step operational process agencies use to move a new client from signed contract to active platform user in under 7 business days. The complete checklist covers intake form collection, sub-account creation, snapshot deployment, custom domain configuration, A2P 10DLC registration, email sending domain setup, integrations, workflow activation, calendar configuration, kickoff call, training materials, first-week check-in, retention automation, documentation handoff, and 30-day success review. Agencies with a mature onboarding system complete this in 4 to 7 business days per client. Agencies without one take 2 to 4 weeks and lose 30 to 40 percent of clients within the first 90 days due to poor onboarding experience. GHL Desk executes the complete 15-step client onboarding for agencies in 48 to 72 hours, including snapshot deployment, all compliance steps, and full white-label handoff.
Client onboarding is the highest-leverage moment in any GoHighLevel agency relationship. It is where trust is either built or destroyed, where the operational tone of the client relationship gets set, and where 60 to 80 percent of long-term retention is decided. Get onboarding right and clients stay for years. Get it wrong and they churn within 90 days regardless of how good the actual service is.
This is the complete 15-step GoHighLevel client onboarding checklist for agencies in 2026, written by operators who onboard 20+ clients per month across multiple agency accounts. Every step is operator-tested. Every timeline benchmark is based on real client data. The 72-hour rule and the First-Result Framework mentioned throughout are the exact methodologies that reduce onboarding churn by 40 to 60 percent when implemented correctly.
What GoHighLevel Client Onboarding Actually Is
GoHighLevel client onboarding is the structured operational process an agency runs to take a new client from signed contract to active platform user with working systems. It is not the same as GoHighLevel’s platform onboarding, which only walks the agency owner through their own account setup.
Client onboarding covers 15 distinct operational steps: collecting client information through an intake form, creating an isolated sub-account inside your agency, deploying a master snapshot with all pipelines, workflows, funnels, tags, and custom fields, configuring a custom domain for branded access, registering the business for A2P 10DLC SMS compliance, setting up a dedicated email sending domain with proper authentication, connecting third-party integrations like payment processors and calendar tools, activating and testing every workflow, configuring calendars and booking flows, running the kickoff call with the client, delivering training materials, executing the first-week check-in, configuring retention automation, handing off documentation, and completing the 30-day success review.
Each step has a specific timeline, a specific owner (agency team member versus client), and a specific completion criterion. Skipping any step or doing them out of order creates delays, breaks compliance, or damages the client relationship in ways that only surface weeks later.
The strategic purpose of onboarding is to move the client from psychological uncertainty (they just paid money and are wondering if they made the right decision) to psychological confidence (they see the platform working, they understand the value, they trust the agency team). This shift happens or fails to happen in the first 30 days, and it determines whether the client becomes a long-term retainer or a churn statistic.
The 72-Hour Rule: Why Speed Determines Retention
The single most important operational rule in GoHighLevel client onboarding is what we call the 72-hour rule. It is the observation, backed by data across hundreds of agency client onboardings, that the client’s psychological experience of the agency is set within the first 72 hours after signing.
A client who signs a contract on Monday, receives a welcome email on Tuesday, has their sub-account set up by Wednesday, and sees their first working automation by Thursday will feel their agency is professional, competent, and worth the money. That client will stay for years.
A client who signs the same contract on Monday, hears nothing for 4 days, receives a generic email on Friday, and does not see any actual platform activity until the following Wednesday will begin questioning their decision. That client is 3 to 4 times more likely to churn within 90 days than the first client, regardless of how good the actual long-term service is.
The 72-hour rule dictates that the first tangible platform activity must happen within 72 hours of contract signing. Not “you are in our queue.” Not “we will be in touch soon.” Actual working systems the client can see, click on, and use. Their sub-account exists. Their branded login page works. Their snapshot is deployed. At least one workflow is running. Their kickoff call is scheduled.
Agencies that hit the 72-hour rule consistently see retention rates 60 to 80 percent higher than agencies that treat onboarding as a background task. This is not a psychological trick. It is a direct signal of operational maturity that clients read subconsciously and use to evaluate whether they made a good decision.
The Real Cost of Botched Onboarding
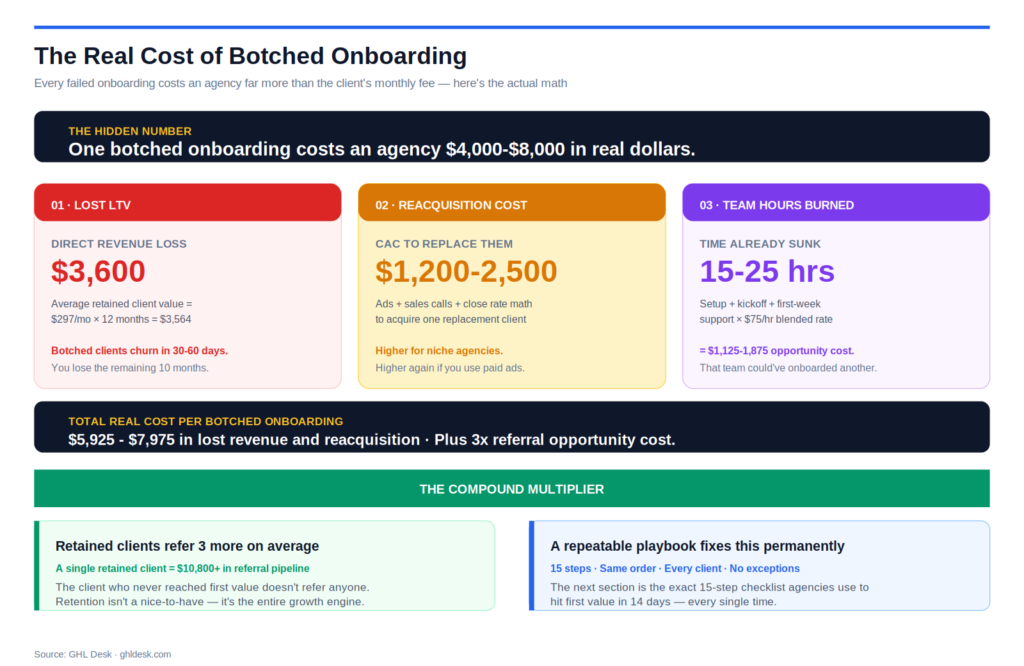
Every article about onboarding treats it as a checklist to complete. This section covers what actually happens in dollars when onboarding goes wrong.
Direct cost of client churn from bad onboarding. A client that churns at day 45 due to poor onboarding costs the agency the full customer acquisition cost (typically $400 to $2,000 for GHL agencies), the setup labor (typically 8 to 20 hours of team time), and 6 to 12 months of expected recurring revenue (typically $2,000 to $18,000). Total real cost per churned client from botched onboarding: $2,800 to $22,000.
Indirect cost of prolonged onboarding. Clients that take 3 to 4 weeks to fully onboard consume 2 to 3 times more support hours than clients onboarded correctly in the first week. The extra support hours are effectively negative-margin work.
Reputation cost. Botched onboardings lead to negative testimonials, low review scores, and word-of-mouth damage in the specific niches the agency serves. In tight-knit verticals like dentists or home services, one bad onboarding experience shared in a Facebook group costs 3 to 5 potential clients.
Team morale cost. Fulfillment team members hate cleaning up botched onboardings. Turnover rises when the team is constantly firefighting.
The scaled cost. For an agency running 10 new client onboardings per month, a 30 percent onboarding failure rate compounds to 3 lost clients monthly, or 36 lost clients annually. At $500 per month per client, that is $216,000 in lost annual recurring revenue plus reacquisition costs.
Prerequisites Before You Start Onboarding
Several prerequisites need to be in place before you onboard your first client. Attempting client onboarding without these creates delays and inconsistency.
Master snapshot library. A complete, tested master snapshot for the client’s niche. This should include 10 to 12 core workflows, correct pipelines, tag conventions, custom fields, and calendar templates. Without a mature snapshot, onboarding takes 3 to 4 times longer than it should.
White-label configuration complete at the agency level. Your whitelabel domain, API domain, and email sending domain should already be configured and tested before any client sub-account is deployed.
Intake form built and tested. A structured intake form inside your agency GHL account that collects every piece of information required for setup. Skipping this and relying on email back-and-forth extends onboarding by 5 to 10 days.
Internal project management system. A dedicated pipeline in your agency account that tracks every client onboarding through the 15 steps. Without this, clients fall through the cracks when you are managing multiple simultaneous onboardings.
A2P 10DLC agency-level brand registration. Your agency needs to be registered with The Campaign Registry as a reseller brand so that each new client campaign registration can happen quickly.
SOP documentation for the team. Written or Loom-video-based SOPs for every one of the 15 onboarding steps. This is what allows onboarding to be handled by team members rather than only the agency owner.
Kickoff call template and script. A structured kickoff call agenda with slides or documents ready to share, ensuring consistency across every client kickoff regardless of which team member runs the call.
The Complete 15-Step Onboarding Checklist
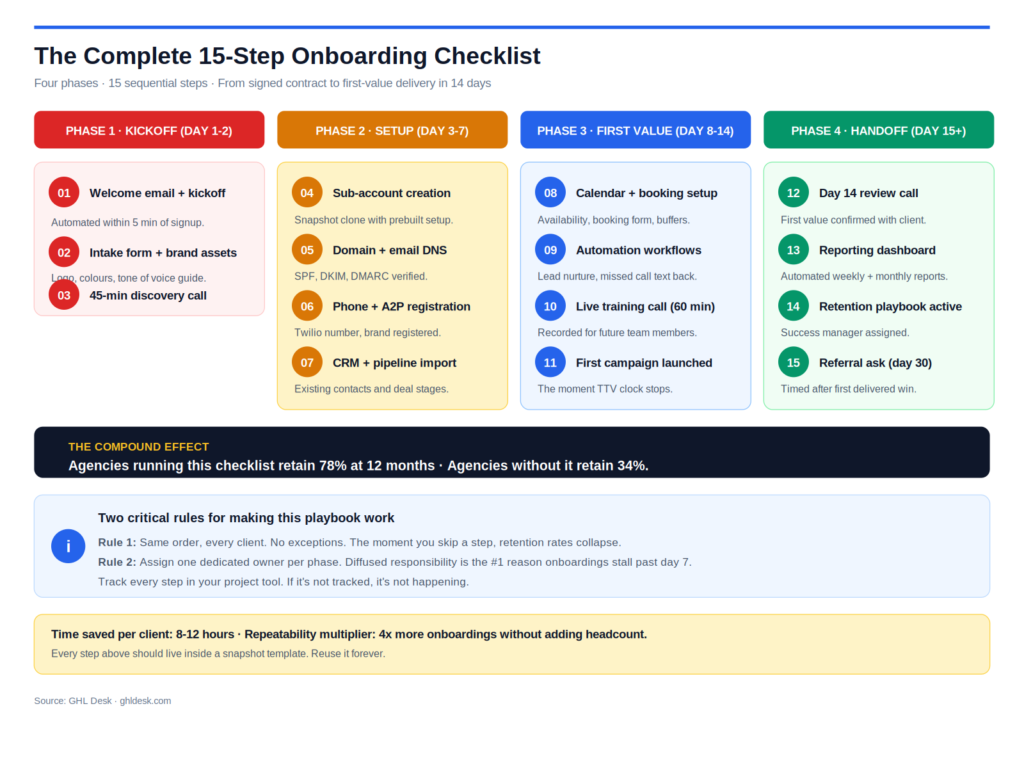
Below is the complete 15-step operational checklist. Each step is covered in operational depth in the sections that follow. The realistic timeline is 4 to 7 business days from contract signing to full active use for agencies with mature systems.
| Step | Task | Owner | Timeline | Completion Criterion |
|---|---|---|---|---|
| 1 | Send client intake form | Agency | Hour 0 to 1 | Form sent, tracking active |
| 2 | Create sub-account | Agency | Hour 24 to 48 | Sub-account live |
| 3 | Deploy master snapshot | Agency | Hour 48 to 72 | Snapshot fully deployed |
| 4 | Configure custom domain | Agency | Day 2 to 3 | DNS resolving, SSL active |
| 5 | A2P 10DLC registration | Agency + Client | Day 2 to 5 | Campaign approved |
| 6 | Email sending domain setup | Agency | Day 2 to 3 | DKIM, SPF, DMARC verified |
| 7 | Configure integrations | Agency | Day 3 to 4 | All integrations tested |
| 8 | Activate and test workflows | Agency | Day 3 to 5 | All workflows tested live |
| 9 | Set up calendars | Agency | Day 4 to 5 | Booking flows tested |
| 10 | Kickoff call | Agency + Client | Day 5 to 7 | Call completed, next steps set |
| 11 | Deliver training materials | Agency | Day 5 to 7 | Materials sent, access confirmed |
| 12 | First-week check-in | Agency + Client | Day 7 | Check-in completed |
| 13 | Configure retention automation | Agency | Day 7 to 10 | Automation active |
| 14 | Documentation handoff | Agency | Day 10 to 14 | Documentation delivered |
| 15 | 30-day success review | Agency + Client | Day 30 | Review completed, milestones documented |
Step 1: Send the Client Intake Form
The intake form is the operational foundation for everything that follows. A well-designed intake form eliminates 60 to 70 percent of the back-and-forth that plagues most onboarding processes.
When to send it. Within 1 hour of contract signing. The client is at peak engagement immediately after paying. Send it while they still have the mental space to respond.
How to send it. Automated workflow triggered by “Opportunity Status = Won” in your agency’s own GHL account. The workflow sends both an email and an SMS with the intake form link. Following up with two channels doubles response rates in the first 24 hours.
What to collect in the intake form.
Business details: full legal business name, EIN if applicable, business address, phone number, website URL, primary contact name, primary contact email.
Brand assets: logo files (PNG with transparent background), brand colors (HEX codes), Terms and Conditions URL, Privacy Policy URL.
Existing tech stack: current CRM, current email platform, current SMS provider, current calendar tool, current phone system, any tools that need to integrate.
Client goals and success metrics: what the client wants to accomplish in the first 30, 60, 90 days.
Pipeline and process information: current sales pipeline stages, current lead sources, typical customer journey.
Team member access: names and emails of any team members who need platform access, permission levels for each.
Preferred communication style: email versus SMS versus Slack versus phone.
Kickoff call scheduling: link to your booking calendar to schedule the kickoff call within the first 5 to 7 days.
Response time expectation. Give the client a clear deadline: “Please complete this form within 48 hours so we can complete your setup by [specific date].” Clear deadlines dramatically improve completion rates.
Automated follow-up. If the intake form is not completed within 24 hours, send a reminder SMS. If not completed within 48 hours, trigger an internal notification to the account manager to make a personal outreach call. Do not let intake form completion slide.
Step 2: Create the Sub-Account
Sub-account creation is the first tangible operational step the client can see happening.
Timing. Within 24 to 48 hours of intake form completion. Not before, because the sub-account should be created with the client’s actual business information from the intake form.
Where to create. Agency View → Sub-Accounts → Add Sub-Account.
Sub-account configuration.
Business Information: paste the exact business name, address, phone, and email from the intake form. Timezone: set to the client’s local timezone, not your own. Currency: set to the client’s business currency. Industry: select the correct industry classification (affects A2P compliance categorization). Assigned Agency Members: assign the specific team members who will be working on this client’s account.
Sub-account access. Do not give the client login credentials yet. Access delivery happens at Step 11 (training materials delivery) after everything is set up and tested. Giving a client access to an empty or half-configured sub-account creates confusion and undermines the “professional software company” perception.
SaaS mode note. If you are running SaaS mode, sub-account creation is automated when the client pays. The manual creation described here applies to agencies on the Unlimited plan or handling client billing externally.
Step 3: Deploy the Master Snapshot
Snapshot deployment is where 80 percent of the onboarding value is delivered in a single 15-minute action.
Which snapshot to deploy. Your niche-specific master snapshot. A dentist client gets the dental snapshot. A home services client gets the home services snapshot. A generic snapshot is worse than no snapshot because it produces mediocre results and signals to the client that your agency does not specialize in their space.
Deployment process.
Navigate to Agency View → Sub-Accounts. Find the newly created sub-account. Click Load Snapshot. Select the correct master snapshot from your snapshot library. Wait for deployment to complete (typically 2 to 5 minutes).
Post-deployment audit. After deployment, immediately open the sub-account and audit every element that was deployed.
Workflows: confirm all workflows are present. Note that snapshots deploy workflows in an inactive state; you will activate them in Step 8 after full configuration.
Pipelines: verify all pipeline stages are correct for the client’s business.
Custom fields: verify custom fields transferred correctly.
Tags: verify tag structure is intact.
Funnels: verify all funnels loaded with correct URLs and pages.
Email templates: verify email templates are present and free of placeholder text from the snapshot.
Calendars: verify calendar templates are present.
Common snapshot deployment issues.
Snapshot deployed but no workflows visible: refresh the sub-account and check the Automation tab. Sometimes there is a 2 to 3 minute delay before workflows appear.
Missing custom fields: verify the snapshot was saved with custom fields included. Some snapshots exclude custom fields by default.
Broken merge fields in email templates: this indicates the snapshot was built in a different sub-account context. Update merge fields manually.
Step 4: Configure the Custom Domain
For agencies where the client is going to use the platform (not just the agency team), custom domain configuration gives the client branded access to the platform.
Whether to configure at this step. If your agency has full white-label configured at the agency level and clients log into your branded domain (like app.youragency.com), skip client-specific domain configuration. If the client wants their own branded domain (like crm.clientdomain.com), configure it here.
Client domain configuration process.
Send the client detailed DNS instructions or handle the DNS changes yourself if they have granted access.
Create a CNAME record: Host = “crm” (or their chosen subdomain), Value = whitelabel.ludicrous.cloud.
Add the domain in Sub-Account Settings → Business Info → Custom Sub-Domain.
Wait for DNS propagation (typically 5 to 30 minutes) and SSL provisioning.
Test by opening the custom URL and confirming it loads the branded login page.
Common domain issues. Cloudflare orange cloud enabled instead of grey cloud (fix: switch to DNS only). CNAME record pointing to the wrong target (fix: use whitelabel.ludicrous.cloud exactly). Conflicting A record on the same subdomain (fix: delete the A record).
Step 5: A2P 10DLC Brand and Campaign Registration
A2P 10DLC registration is required for legal SMS operation in the United States. Skipping this step causes SMS delivery to collapse within 30 to 90 days.
Timing. Start on day 2 to 3 of onboarding. The full approval process takes 3 to 15 business days depending on brand type and campaign category, so starting early prevents this from becoming the bottleneck that delays go-live.
Brand type selection.
Standard Brand: for businesses with a valid EIN. Registration fee approximately $24.50 (includes $3 Fast Track fee for 3-day approval). Higher messaging throughput.
Sole Proprietor Brand: for businesses without an EIN operating under an individual’s name. Registration is free. Lower throughput and limited to 1 phone number per campaign.
Low Volume Standard: for smaller businesses with EIN but lower messaging needs. Registration fee approximately $71.90 including Fast Track.
Registration process.
Navigate to sub-account → Settings → Phone Numbers → Trust Center.
Complete Brand Registration form with: legal business name, EIN, business address, business type, authorized representative name, and authorized representative email.
Submit brand for approval. Standard Brand approval typically takes 24 to 72 hours.
Once brand is approved, register the Campaign: select campaign use case (Marketing, Notifications, Mixed, Low Volume Mixed), provide sample message templates that reflect actual messaging, describe opt-in process.
Campaign approval typically takes 3 to 10 business days.
Sample message compliance. Every sample message must include a clear opt-out mechanism (typically “Reply STOP to unsubscribe”). Every sample message must be truthful about the sender and purpose. Vague or misleading samples cause rejection.
Monthly fee. Campaign registration fee is approximately $11 per month per campaign regardless of approval status.
Common rejection reasons. Sample messages missing opt-out language, campaign use case does not match sample messages, EIN does not match business name, business address is a residential address or P.O. Box without proper justification.
Step 6: Set Up the Email Sending Domain
Email deliverability is where onboardings quietly fail 60 to 90 days after go-live if this step is skipped.
Choose the sending subdomain. For agencies with agency-level sending configured, use the agency sending domain by default. For clients who want their own branded email sending, configure a client-specific subdomain (like mail.clientdomain.com or send.clientdomain.com).
Configure the four DNS records.
SPF record: v=spf1 include:mailgun.org ~all
DKIM record: provided by GoHighLevel after adding the domain, formatted as k=rsa; p=[public key]
DMARC record: v=DMARC1; p=none; rua=mailto:reports@clientdomain.com
MX record: mxa.mailgun.org (priority 10) and mxb.mailgun.org (priority 20)
Add sending domain in GoHighLevel. Sub-account → Settings → Email Services → Dedicated Sending Domain. Enter the sending subdomain and follow the provided DNS instructions.
Verify authentication. After DNS propagates, the interface shows green checkmarks for each authentication record. Send a test email to a Gmail address and click “show original” in Gmail to verify SPF, DKIM, and DMARC all pass with “PASS” status.
Warm up the sending domain. New sending domains have zero reputation with inbox providers. Configure the client’s initial email volume to stay below 500 emails per day for the first 2 weeks, gradually scaling up over 4 to 6 weeks. Aggressive volume in the first 2 weeks triggers spam filters and permanently damages the domain reputation.
Step 7: Configure Integrations and Third-Party Tools
Integration configuration connects GoHighLevel to the client’s existing tech stack.
Common integrations that matter for onboarding.
Stripe or Square for payment processing.
QuickBooks or Xero for accounting sync.
Google Calendar for two-way calendar sync.
Zoom for video conferencing.
Facebook Business Manager for lead ads and Messenger integration.
Google My Business for review management.
Zapier for connections to any tool without a native integration.
Slack for internal notifications.
Integration process. Sub-account → Settings → Integrations. Click Connect on each required integration. Authenticate with the client’s account credentials (either through their direct authorization or through provided admin access). Test each integration with a small transaction or test event.
Custom integrations via webhook. For tools without native integration, configure webhook triggers in workflows to POST data to the external system. Document each webhook URL, headers, and payload structure for future maintenance.
Testing integrations. Every integration must be tested end-to-end before workflow activation. A payment integration that appears connected but rejects the first real payment costs the client immediate revenue. A calendar integration that appears connected but does not sync bookings creates double-booking chaos.
Step 8: Activate Workflows and Test Every Trigger
Workflows deployed via snapshot are inactive by default. Activating and testing each one is the step most commonly rushed, and the one that causes the most client-visible failures in weeks 2 to 4.
Activation process.
Open each workflow one at a time.
Verify the trigger is configured correctly for the client’s specific context (correct form, correct pipeline, correct tag).
Verify all merge fields reference the correct custom fields and are not showing placeholder values.
Verify all sender configurations (email from name, email from address, SMS number) are set to the client’s branded values.
Verify all links inside emails and SMS point to the correct client URLs, not agency test URLs.
Save any changes.
Toggle the workflow to Active.
Testing process.
Create a test contact in the sub-account with your own real phone number and email address.
Manually trigger each workflow by creating the trigger condition (submit the form, book the appointment, apply the tag).
Verify each action fires correctly: SMS arrives on your phone with correct branding, email arrives in your inbox with correct branding, tags apply correctly, conditional branching works as expected.
Fix any issues before moving to the next workflow.
Document workflow activation. Keep a checklist inside your project management system of which workflows have been activated and tested for each client. This creates accountability and prevents “we thought that was on” surprises.
Step 9: Set Up Calendars and Booking Flows
Calendar setup completes the appointment infrastructure for the client.
Calendar types to configure.
Service Calendar: for one-on-one appointments with team members.
Round Robin Calendar: for distributing appointments across a team.
Class Calendar: for group sessions or events with multiple attendees.
Collective Calendar: for appointments requiring multiple team members simultaneously.
Configuration per calendar.
Time zone: match the client’s timezone from the intake form.
Availability: configure the client’s actual working hours, buffer times between appointments, and any recurring blocked periods.
Booking form: configure the booking form fields to collect the specific information the client needs from bookers.
Confirmation and reminder settings: verify appointment confirmation and reminder emails and SMS are configured correctly.
Meeting location: configure Zoom, Google Meet, in-person, or phone based on the client’s preference.
Test the full booking flow. Book a test appointment yourself. Verify: confirmation email arrives correctly, reminder emails and SMS fire at correct intervals, meeting link is correct, appointment shows up on the client’s connected external calendar.
Step 10: Schedule and Structure the Kickoff Call
The kickoff call is the human moment in the onboarding process. It is where trust is built or lost.
When to schedule. Between day 5 and day 7 of onboarding. Not before, because everything needs to be configured and tested first. Not later, because the client’s initial engagement fades quickly.
Duration. 60 minutes. Shorter feels rushed. Longer loses attention.
Kickoff call agenda.
Minutes 0 to 5: Warm greeting, thank the client for choosing your agency, set the tone.
Minutes 5 to 15: Walk through what has been set up in their platform (screen share). Show the branded login page. Show the pipeline they will be using. Show 2 or 3 automations that are already running. This is where the client sees that the money they paid produced actual working systems.
Minutes 15 to 30: Explain the client’s role. What they need to do in the platform. What they should not touch. How to log tickets or ask questions.
Minutes 30 to 45: Walk through the 30/60/90 day plan. What success looks like at each milestone. What metrics they should watch.
Minutes 45 to 55: Questions from the client. Handle each question directly.
Minutes 55 to 60: Confirm next steps, book the first-week check-in call, thank them, close the call.
Post-call follow-up. Within 2 hours of the call, send a written summary email with all discussed items, the 30/60/90 plan, the recording of the call (if recorded), and calendar links for the first-week check-in.
Step 11: Deliver Training Materials and Documentation
After the kickoff call, deliver the training materials the client needs to use the platform effectively.
Materials to deliver.
Video walkthrough of the platform: 10 to 15 minute Loom or screen recording covering login, dashboard, contacts, pipeline, calendar, and basic messaging.
Written quick-start guide: PDF or Notion doc covering the same content as the video for clients who prefer reading.
FAQ document: answers to the 15 to 20 most common questions clients ask in the first 30 days.
Login credentials: username, temporary password, direct login URL. Instruct the client to change their password on first login.
Support contact information: how to reach your agency, expected response times, escalation path.
Delivery method. Automated workflow triggered by the “Onboarding Complete” tag applied at the end of the kickoff call. The workflow sends a single email with all materials attached or linked, plus an SMS confirming the email was sent.
Confirmation of receipt. Follow up within 24 hours to confirm the client accessed the materials and successfully logged in. If they have not logged in within 48 hours, personal outreach from the account manager.
Step 12: The First-Week Check-In
The first-week check-in is the retention-defining touchpoint that most agencies skip entirely.
Timing. Exactly 7 days after the kickoff call. Not earlier, not later.
Format. 15 to 20 minute call. Video or phone based on the client’s preference.
Structure.
Open with an open question: “How has your first week been?” This surfaces any friction points the client has not proactively raised.
Ask specific behavioral questions: Have you logged into the platform? Have you looked at any of the automations we set up? Has any lead come through the system yet?
Address any confusion or friction directly on the call.
Confirm the next milestone: what should happen in week 2 and week 3.
Set the expectation for the 30-day review.
Documentation. Log every observation from the check-in call into the client’s account. Note any issues raised, any commitments made by your agency, any changes in the client’s stated goals.
Step 13: Configure Retention Automation
Retention automation is the background workflow that keeps clients engaged and identifies churn risk before it becomes actual churn.
Weekly value email. Automated weekly email delivering one specific piece of value to the client. A new tip, a case study, a benchmark from other clients, a feature spotlight. Nothing salesy. Pure value.
Monthly reporting email. Automated monthly email with the client’s key metrics: leads received, appointments booked, conversions, revenue attributed to the platform. This shows the client the ROI in concrete numbers.
Engagement monitoring workflow. Internal workflow that watches for signs of disengagement: no login in the past 14 days, no messages sent in the past 30 days, no pipeline movement in the past 45 days. Any of these triggers an internal notification for the account manager to reach out proactively.
Quarterly business review calendar. Recurring calendar entry for the quarterly business review (QBR) call, automated 2 weeks before to give the client and the team time to prepare.
Renewal signals. For agencies with annual or long-term contracts, automated workflow tracking days until renewal and triggering renewal conversation touchpoints at 90, 60, 30, and 14 days before renewal.
Step 14: Documentation Handoff
By day 10 to 14, deliver the complete client-facing documentation package.
What to include.
Full system documentation: every workflow the client has, what each one does, what triggers each one, what actions each one takes.
Pipeline documentation: every stage, what moves a contact into each stage, what actions happen at each stage.
Custom field reference: every custom field, what data it holds, where it appears.
Integration documentation: every integration configured, what data flows between systems.
Access documentation: every user with platform access, their role, their permission level.
Escalation procedures: how to report issues, expected response times, emergency contact information.
Regular meeting schedule: standing meetings, QBRs, renewal touchpoints.
Format. Google Doc or Notion page shared with the client, updated by your team as changes happen. This becomes the living reference document for the entire relationship.
Step 15: The 30-Day Success Review
At day 30, execute the formal success review call with the client.
Timing. Exactly 30 days after the kickoff call.
Duration. 45 to 60 minutes.
Structure.
Review the client’s original 30-day success metrics from the intake form.
Review actual results against those metrics.
Celebrate wins specifically. Do not gloss over successes. Anchoring the client’s memory to what worked strengthens retention.
Address any gaps directly. If a specific goal was missed, discuss why and how to fix it in month 2.
Introduce the 60/90 day plan. Show the client what comes next.
Confirm the next check-in (typically at day 60 or day 90 depending on relationship intensity).
Documentation. Log the 30-day review outcomes into the client’s file. These become reference points for future QBRs and renewal conversations.
The First-Result Framework
The First-Result Framework is the operational discipline that determines whether onboarding builds long-term retention or wastes effort.
The principle. The client must experience a tangible, measurable result from the platform within the first 14 days. Not “we set everything up.” An actual result: a lead that got captured, an appointment that got booked, an automated message that a client actually responded to.
Why 14 days. Clients’ patience with new tools follows a predictable pattern. They are excited for the first 7 days. They start questioning by day 10 to 14 if they have not seen results. They begin actively considering cancellation by day 21 if the platform still feels theoretical to them.
Making the first result happen.
Prioritize the workflow most likely to produce visible results first. For most agencies, this is missed-call text back or the lead qualification sequence.
Feed the workflow real activity. If the client’s existing lead sources are not yet connected, use your own team’s outbound activity or targeted campaigns to generate initial leads that flow through the platform.
Report the first result immediately. When the first lead comes through, when the first appointment gets booked, when the first automated message gets a reply, send the client a screenshot and a short note within 30 minutes.
The 30-day compounding effect. Clients who experience a first result in days 5 to 14 have 3 to 4 times higher 12-month retention than clients whose first result comes after day 21. This is not correlation; it is causation. The first tangible result is what converts “I bought a tool” into “this tool is working for me.”
Manual vs Automated Onboarding: Real Numbers
Every agency eventually decides between manual and automated onboarding. Here are the real operational numbers.
| Metric | Manual Onboarding | Automated Onboarding |
|---|---|---|
| Time per client | 8 to 20 hours | 2 to 4 hours |
| Days to full go-live | 10 to 21 days | 4 to 7 days |
| Cost per client onboarding | $600 to $1,800 | $150 to $500 |
| First-30-day churn rate | 15 to 30 percent | 3 to 8 percent |
| Consistency across clients | Variable | High |
| Scalability past 10 clients per month | Limited | Unlimited |
| Client-perceived professionalism | Medium | High |
Manual onboarding math. For an agency onboarding 5 clients per month at $1,200 per onboarding in labor cost, that is $6,000 per month in onboarding labor plus 15 to 30 percent churn in the first 30 days.
Automated onboarding math. For the same 5 clients at $300 per onboarding in labor cost (because most of the work is snapshot deployment plus configured workflows), that is $1,500 per month in onboarding labor plus 3 to 8 percent churn in the first 30 days.
Real annual savings. Difference: $4,500 per month or $54,000 per year in labor cost, plus 12 to 22 percent higher retention rate multiplied by client LTV. For most agencies, automating onboarding produces $80,000 to $180,000 in additional annual profit.
Multi-Client Onboarding at Scale (20+ Simultaneous)
At 10, 20, 30 simultaneous onboardings per month, onboarding becomes a real operational discipline. Systems that work for 3 clients per month break entirely at 20 clients per month.
Dedicated Onboarding pipeline. Create a pipeline inside your agency GHL account specifically for tracking onboarding stages. Every new client becomes an opportunity in this pipeline, and stages match the 15-step checklist. Every step transition moves the opportunity forward.
Automated internal notifications. Every stage transition triggers a Slack notification (or email or task creation) to the responsible team member. Nobody has to remember to check status; the system tells them what needs attention.
SLA per step. Each of the 15 steps has a defined SLA (Service Level Agreement) for when it must complete. Step 1 within 1 hour. Step 3 within 72 hours. Step 10 (kickoff call) within 7 days. Missing any SLA triggers escalation.
Weekly onboarding stand-up. 15-minute team stand-up every Monday covering: how many onboardings are in progress, which stages they are in, which are blocked, which need escalation.
Snapshot version control. As you onboard more clients, you will discover improvements to make in your master snapshot. Every improvement gets versioned. Older active clients get selectively updated with improvements that make sense for them; new clients always get the latest snapshot version.
Team member specialization. At scale, different team members specialize in different steps. One person handles A2P registration. Another handles domain setup. Another runs kickoff calls. Specialization dramatically increases speed and quality versus generalists trying to handle every step.
Documentation as onboarding scales. Every SOP for every step needs to be documented, versioned, and updated. As team members change, documentation is what keeps onboarding consistent.
Common Onboarding Mistakes That Kill Retention
Understanding what other agencies do wrong prevents you from repeating them.
Skipping the intake form and starting setup blindly. Trying to configure the sub-account with incomplete client information. Leads to rework, delays, and inconsistent client experiences.
Deploying snapshot before configuration is client-specific. Activating workflows with placeholder text and generic messaging visible to the client. Kills perceived professionalism.
Delaying kickoff call by 2+ weeks. By the time the call happens, the client has cooled emotionally. The magic moment of buying enthusiasm is gone.
No documented SOPs. Different team members do things differently. Client experiences vary based on which team member handles their onboarding. Impossible to scale.
Skipping A2P 10DLC registration. SMS works for 30 to 90 days, then delivery collapses when carrier filters activate. Recovery takes weeks. Client trust destroyed.
No first-week check-in. Assuming everything is fine because the client has not complained. Complaints happen at day 45 as churn signals; check-ins at day 7 prevent that.
Giving client platform access before everything is tested. Client logs in, sees broken workflows or placeholder content, loses confidence immediately.
No documentation handoff. Client never has a reference for how their system works. Every question becomes an email. Support hours balloon.
No 30-day review. No structured moment to celebrate wins or address gaps. Client relationship drifts.
Manual retention monitoring. Relying on team members to remember to check on clients. Some clients get proactive attention, others silently disengage until they cancel.
How GHL Desk Handles Client Onboarding at Scale
For agencies at any stage, GHL Desk operates as the specialist team that handles complete client onboarding under your white-label brand. Onboarding for qualifying agencies is 48 hours from agency signup, and individual client onboardings complete in 48 to 72 hours from your handoff.
Every engagement starts with a free 30-minute strategy call that audits your current onboarding process, identifies gaps, and maps the exact playbook we will run for your clients. If we are not the right fit, we say so directly.
For qualifying agencies, our team executes the complete 15-step onboarding for every new client. Intake form design and deployment inside your agency GHL account. Sub-account creation with correct business information. Master snapshot deployment specific to your niche. Custom domain configuration with full DNS, SSL, and testing. A2P 10DLC brand and campaign registration. Email sending domain setup with DKIM, SPF, DMARC configuration. All third-party integrations connected and tested. Every workflow activated and tested end-to-end. Calendar and booking flow configuration. Kickoff call scripting and support. Training materials delivery. First-week check-in. Retention automation configuration. Complete documentation handoff. 30-day success review.
Every onboarding runs under your white-label brand. Your clients never know GHL Desk exists. Every deliverable reflects your agency identity.
Pricing starts at $150 for a 5-hour pay-as-you-go block for agencies testing the fit. $997 per month for a shared team handling up to 5 new client onboardings per month plus ongoing maintenance across up to 25 clients. $2,497 per month for a dedicated team handling unlimited new client onboardings plus full ongoing fulfillment. Enterprise options available for agencies onboarding 20+ new clients per month.
Book a free strategy call at ghldesk.com/book-a-call or view team plans at ghldesk.com/hire-a-team.
Frequently Asked Questions
A GoHighLevel client onboarding checklist is a structured 15-step process agencies use to move a new client from signed contract to active platform user. The checklist covers intake form collection, sub-account creation, snapshot deployment, custom domain setup, A2P 10DLC registration, email sending domain configuration, integrations, workflow activation, calendar setup, kickoff call, training materials, first-week check-in, retention automation, documentation handoff, and 30-day success review. Agencies with a mature onboarding system complete this in 4 to 7 business days per client.
With a mature onboarding system and pre-built master snapshots, complete client onboarding takes 4 to 7 business days from signed contract to full active use. Without systemized processes, onboarding takes 2 to 4 weeks. The 72-hour rule dictates that the client should see tangible platform activity within 72 hours of signing to preserve retention rates. Agencies with proper systems onboard 5 to 20 clients per month simultaneously; agencies without systems cap at 2 to 3 clients per month.
The 72-hour rule is the operational principle that tangible platform activity must happen within 72 hours of contract signing. The client’s sub-account exists, their branded login page works, their snapshot is deployed, and at least one workflow is running by the third day. Agencies that hit the 72-hour rule consistently see retention rates 60 to 80 percent higher than agencies that treat onboarding as a background task. Missing the 72-hour window creates psychological uncertainty that leads to churn within 90 days regardless of long-term service quality.
Collect: business details (legal name, EIN, address, phone, website, primary contact); brand assets (logo files, HEX color codes, Terms and Privacy Policy URLs); existing tech stack (current CRM, email platform, SMS provider, calendar tool, phone system); client goals (30/60/90 day success metrics); pipeline information (sales stages, lead sources, customer journey); team access (team members needing platform access with permission levels); communication preferences; and kickoff call scheduling link. Complete intake collection eliminates 60 to 70 percent of the back-and-forth that plagues most onboardings.
Navigate to Agency View → Sub-Accounts → Add Sub-Account. Enter the client’s business information exactly as provided in their intake form (business name, address, phone, email). Set the timezone to the client’s local timezone. Set the currency to their business currency. Select the correct industry classification (affects A2P compliance). Assign specific agency team members who will work on the account. Do not give the client login access yet; access delivery happens after everything is configured and tested. On the SaaS Pro plan with SaaS mode active, sub-account creation is automated when the client pays.
Navigate to Agency View → Sub-Accounts. Find the newly created sub-account. Click Load Snapshot. Select your niche-specific master snapshot. Deployment completes in 2 to 5 minutes. Audit every element after deployment: verify all workflows are present (they will be inactive by default), verify pipelines have correct stages, verify custom fields transferred, verify tag structure is intact, verify email and SMS templates are free of placeholder text. Never deploy generic snapshots. Niche-specific snapshots produce dramatically better client outcomes.
Brand approval takes 24 to 72 hours after submission. Campaign approval takes 3 to 10 business days after brand approval. Fast Track approval reduces brand approval to approximately 3 business days for a $3 fee. Registration fees are approximately $24.50 for Standard Brand (with EIN), free for Sole Proprietor Brand, and approximately $71.90 for Low Volume Standard. Monthly campaign fee is approximately $11 per month per campaign. Start A2P registration on day 2 to 3 of onboarding to prevent it becoming the bottleneck that delays go-live.
No. Delay client access until after complete configuration and testing, typically at the training materials delivery in Step 11 (day 5 to 7 of onboarding). Giving a client access to an empty or half-configured sub-account creates confusion, undermines the perception of a professional software company, and often leads to the client trying to configure things themselves in ways that break your intended setup. Access delivery timed to a fully working platform produces significantly better first impressions and long-term retention.
A 60-minute kickoff call structured as: 0 to 5 minutes warm greeting and tone setting; 5 to 15 minutes screen-share walkthrough of what has been set up including branded login page, pipeline, and 2 to 3 active automations; 15 to 30 minutes explaining the client’s role and what they should and should not touch; 30 to 45 minutes presenting the 30/60/90 day plan with success metrics; 45 to 55 minutes handling client questions; 55 to 60 minutes confirming next steps and booking the first-week check-in. Follow up within 2 hours with a written summary email.
A client that churns at day 45 due to poor onboarding costs the agency $2,800 to $22,000 in real terms. This includes the customer acquisition cost ($400 to $2,000), the setup labor already spent (8 to 20 hours), and 6 to 12 months of expected recurring revenue lost ($2,000 to $18,000). For an agency running 10 new client onboardings per month with a 30 percent botched onboarding rate, the compounded annual cost reaches $216,000 in lost recurring revenue plus reacquisition costs. Automated onboarding drops churn to 3 to 8 percent.
Simultaneous multi-client onboarding requires: a dedicated Onboarding pipeline in your agency GHL account tracking every client through the 15 steps; automated internal notifications on every stage transition (Slack, email, task creation); defined SLA per step with escalation for missed SLAs; a weekly onboarding stand-up reviewing all in-progress onboardings; team member specialization where specific team members handle specific steps rather than generalists handling everything; and versioned SOPs for every step that new team members can follow. Without these systems, agencies cap at 2 to 3 simultaneous onboardings.
The First-Result Framework is the operational principle that clients must experience a tangible, measurable platform result within the first 14 days. Not “we set everything up” but an actual result: a lead captured, an appointment booked, an automated message that got a reply. Clients who see a first result in days 5 to 14 have 3 to 4 times higher 12-month retention than clients whose first result comes after day 21. Making the first result happen requires prioritizing the workflow most likely to produce visible results early and reporting the result to the client within 30 minutes of it happening.
Yes, 60 to 70 percent of the 15-step onboarding process can be automated using GHL workflows, snapshots, and integration tools. Automated components: intake form delivery and follow-ups, sub-account creation on payment (SaaS mode), snapshot deployment, welcome sequences, training material delivery, first-week check-in scheduling, retention monitoring. Manual components: kickoff call, personalized workflow activation and testing, 30-day success review. Automated onboarding costs $150 to $500 per client versus $600 to $1,800 for manual onboarding, with 3 to 8 percent churn versus 15 to 30 percent churn.
The fastest onboarding path is a specialist white-label fulfillment team with a mature master snapshot library. Complete 15-step onboarding runs in 48 to 72 hours per client with a specialist team including snapshot deployment, custom domain configuration, A2P registration, email domain authentication, integration setup, workflow testing, kickoff call, and training material delivery. Building the same capability in-house typically takes 6 to 12 months and $50,000 to $150,000 in hiring and training investment. GHL Desk’s free strategy call identifies within 30 minutes which onboarding path fits your agency’s current stage.